- Paving
- Electrical Engineering and Telecoms Infrastructure
- Civil Engineering, Mining, Railway, Building and Plumbing Products
- Curbs / Kerbs
- Landscaping, Streetscaping, Gardening products
- Moulds
- Pizza Oven Kit
- Avalon range
- Builders' and Plumbers' Products
- Benches and Seats
- Concrete Tables
- Grass Blocks
- Litter/Refuse Bins
- Pots and planters (Discontinued)
- Tree rings
- Bollards and Barriers
- Stone Cellar Blocks
- Water features (Discontinued)
UT-BOX
|
|
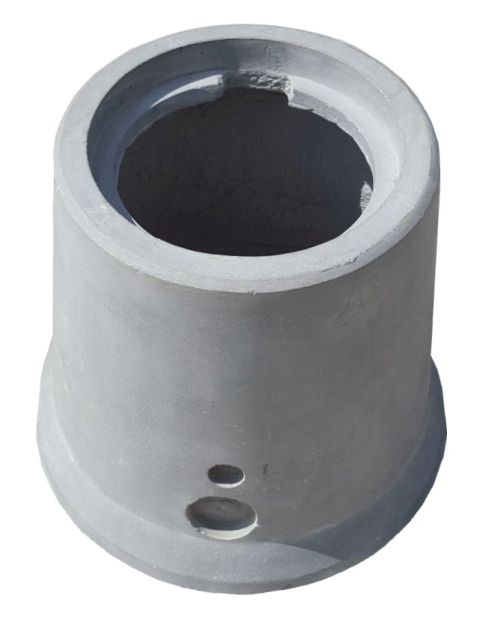
IntroductionThe Vanstone UT-BOX is a Utility underground mini chamber suitable for use as a joining box, a draw box, a valve box, a meter box or an inspection box. Is is particularly suitable for fibre optic cables and local branch-off's like fibre to the home (FTTH) connections. It is light-weight, yet strong being made of the latest technology in TRC (textile reinforced concrete). See Specification. After unpacking, the UT-BOX is ready for use. All that you need to do is put the box on the base and knock out the holes that you will be using. The UT-Box is light-weight and stackable, which makes it a good traveller. It is economical, has almost no metal content and is not subject to damage by veld fires as are plastic or fibre glass based boxes. |

View without lid |
Dimensions:
|
 |
Service entry knock-outs:Entry is by means of knock-out holes. This allows you to only knock out the holes that you are going to use. Standard knock-outs placed in four quadrants are: see drawing
Any size, number of configuration of knock-outs is possible. |
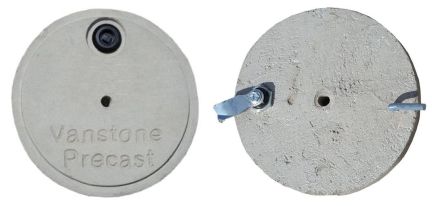
Available Lids: Lids are made of TRC and are light-weight and strong. If sufficient quantities are ordered, the Customer's logo and other info may be inprinted into the lid. |
Load Bearing Capacity:Vanstone's UT-Box is of light duty class to be installed in areas where vehicle wheels do not have access. As such it complies with SANS 558, LD. The UT-Box has been tested to 8.1kN on the lid and can therefore withstand occasional light vehicle wheel loads. |
Packaging:Transportation of UT-Boxes is highly effective. The UT-Boxes are light-weight, compact and stackable. It is generally packaged in 18's or 27's per wrapped wooden pallet. Numbers per vehicle (estimate): Long road truck: 648, possibly double, |

Components
|
||||
 |
 |
 |
 |
 |
| Complete UT-Box Item Code P2-1516 UT-Box complete no Latch Item Code P2-1516/L UT-Box complete with Latch |
Ring Wall only | Base only | Lid without latch | Lid with latch |
InstallationMethod 1 Conventional Installation: In the bottom of the excavation, prepare a true and level bed, 30mm thick of river sand or similar. Place the loose base of the UT-Box carefully on the bed ensuring proper and even seating. Determine which services will be installed and knock out the required holes. See below. Place the chamber on the base and install the services. The chamber walls may be attached to the base by means of epoxy adhesive but it is not essential. After the installation of services, any openings may be sealed with PU foam. Full water tightness is not easily achievable. Method 2 Installation over Services: Method 3 Installation without Floor: |
|||
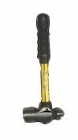
| Knocking out of Holes Use a light ball head or ball-pein hammer of no more than 1½ lbs. Identify the hole to be knocked out by looking on the outside. Put one hand over the hole. Now locate the hole's corresponding inside position by placing the other hand on the inside of the wall directly over it. Mark if necessary. Start tapping from the inside with the ball of the hammer as close as possible to the centre of the hole. The taps should be light and repeatedly on the same spot until penetration occurs. Carefully enlarge the hole from the centre out until it is complete. NEVER use force, a heavy hammer or knock the from the outside in. |
 |
||